Installing Operating System
The Android image for the Kickpi K2B/K2C supports both SD card installation and USB installation, while the Ubuntu image currently only supports SD card installation. Motherboards equipped with an eMMC module come pre-flashed with the Android 12 system image by default at the factory.
Obtaining Image
Obtain Kickpi K2B/K2C image files from OneDrive.
├── K2B
│   ├── Android12.0_Tablet
│   ├── Android12.0_TV
│   ├── Ubuntu2204_desktop
│   └── Ubuntu2204_server
└── K2C
    ├── Android12.0_Tablet
    ├── Android12.0_TV
    ├── Ubuntu2204_desktop
    └── Ubuntu2204_server
Android Image SD Card Installation
K2B/K2C has a SD card slot ( microSD aka. TransFlash or TF ) which can also serves as a bootable device. In K2B/K2C's boot sequence, SD card has higher priority, so K2B/K2C always try to boot from SD card first, when no one mounted, K2B/K2C then boot from on-board eMMC. Since SoC vendor's official Tools use terminology SD(microSD) instead of TF, so we use SD card in this context, TF and SD means the same thing.
With SoC vendor's tool, we can make 2 types of booting card. SD Boot Card works like a portable edition OS, e.g. windows PE. We use SD Boot Card to power device for some maintain and fix purpose. also can be used to verify your own customization. the second type is SD installation card. you create this kind of booting card when you try to use it to install new Image into on-board eMMC. it contains a specific script to create partition, format FS, copy files to eMMC. Make sure you understand what you need and create the right SD card.
Preparation
Note
Supported SD card filesystem formats: exfat, NTFS
SD Boot Card (SD Boot): Contains bootloader and complete system image, supports device booting directly from microSD card, used in scenarios like eMMC, dev debugging.
SD Installation Card (Upgrade Firmware): Stores firmware image and installation script, used to install or upgrade firmware to the device's on-board storage (e.g., eMMC).
-
Hardware: Windows PC/laptop, HDMI Display (optional), USB TYPE-C cable(some cheap TYPE-C cable only provide current, make sure use the one capable of data exchange). some users reported when using double male TYPE-C to TYPE-C cable, installation failed sometimes, when switch to double male USB TYPE-A to TYPE-C, it's ok.
-
Software: Installing tool PhoenixCard, Android image.
SD Boot Card
When both the eMMC and the SD boot card have system images installed, the system will boot from the SD card by priority.
1. Navigate to the PhoenixCard extracted folder and launch PhoenixCard.

2. Follow the steps shown in the diagram to flash the downloaded image onto the SD card.
Tip
During the operation, if PhoenixCard prompts to format the SD card, simply confirm the formatting.

3. The SD boot card is created successfully.

4. Power off the motherboard, insert the SD boot card into the TF card slot on the motherboard, reconnect the power supply, and wait for the system desktop to display normally on the monitor
Success
The green LED remains lit, and the blue LED blinks continuously (the blue LED will not light up immediately, please wait patiently).
SD Installation Card
1. Navigate to the PhoenixCard extracted folder and launch PhoenixCard.
2. Follow the steps shown in the diagram to flash the downloaded image onto the SD card.
Tip
During the operation, if PhoenixCard prompts to format the SD card, simply confirm the formatting.

3. The SD installation card is created successfully.

4. Power off the motherboard, insert the SD installation card into the TF card slot on the motherboard, and wait for the image installation to complete.
Success
A progress bar will be displayed on the monitor during the installation; the monitor will turn off upon completion, and both the green and blue LEDs will be off simultaneously. At this point, remove the SD card, power the motherboard back on, and wait for the system to restart.
Android Image USB Installation
Install the Android image via USB. Please check if the development board has an onboard eMMC. If it does not have one, you can skip this , in this scenario, board can only only boot from SD boot card.
Preparation
-
Hardware: DC 12V independent power supply, USB A-to-C cable.
-
Software: Installing tool PhoenixSuit, Android image.
Steps
1. The board enters the Installation Mode,the green LED stays on.
Note
Installation Mode:
When the board is powered off, long-press the FEL button on the bottom side of the board, then connect the power supply. The green light on the board will stay on, indicating successful entry into Installation mode.
When the board is powered on, first press and hold the FEL button,don't let loose, then press RST button. The green light will stay on, indicating successful entry into Installation mode.

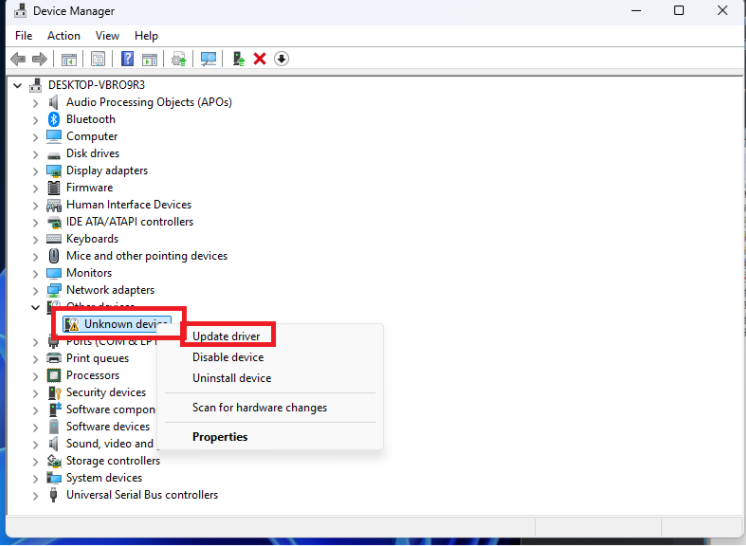
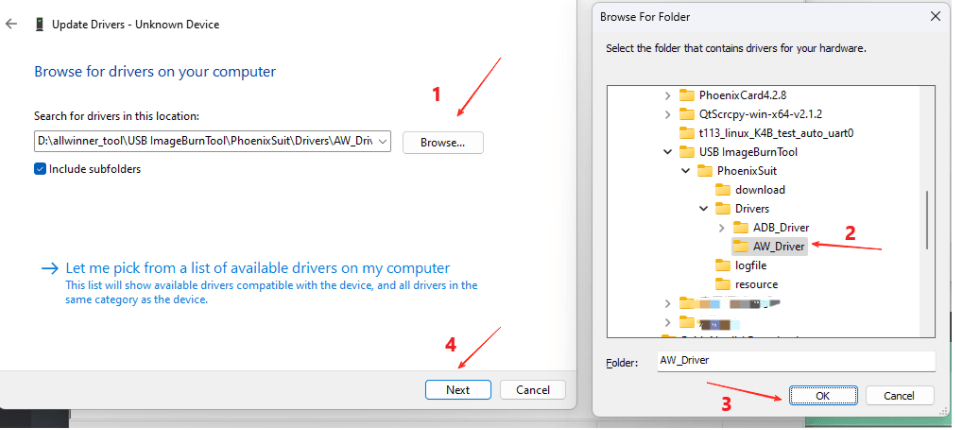
2. Install driver, connect the computer via a USB A - to - C cable, open the computer's Device Manager, and follow the operations shown in the diagram.
Tip
Driver folder path: PhoenixSuit/Drivers/AW_Driver/

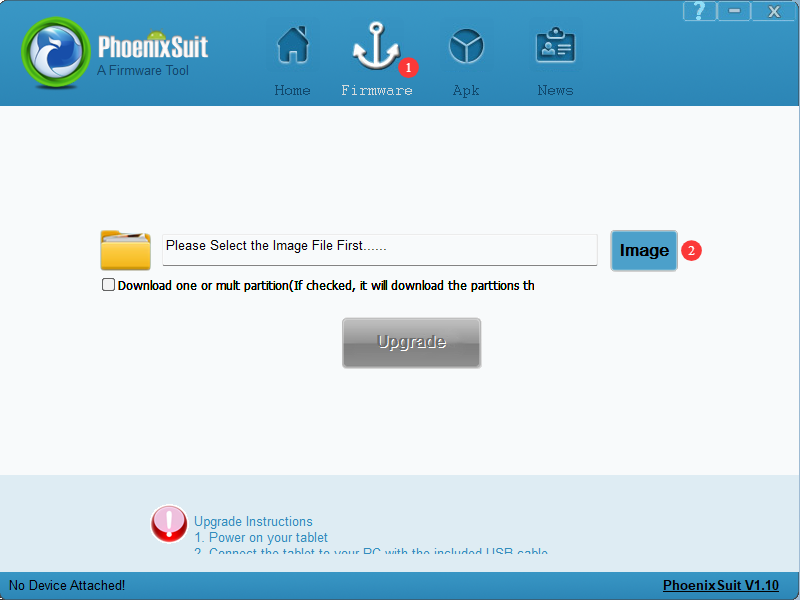
3. Open PhoenixSuit from the extracted folder in Administrator mode.

4. In the installing software, click "firmware" to select the image to be install (do not click "Upgrade").
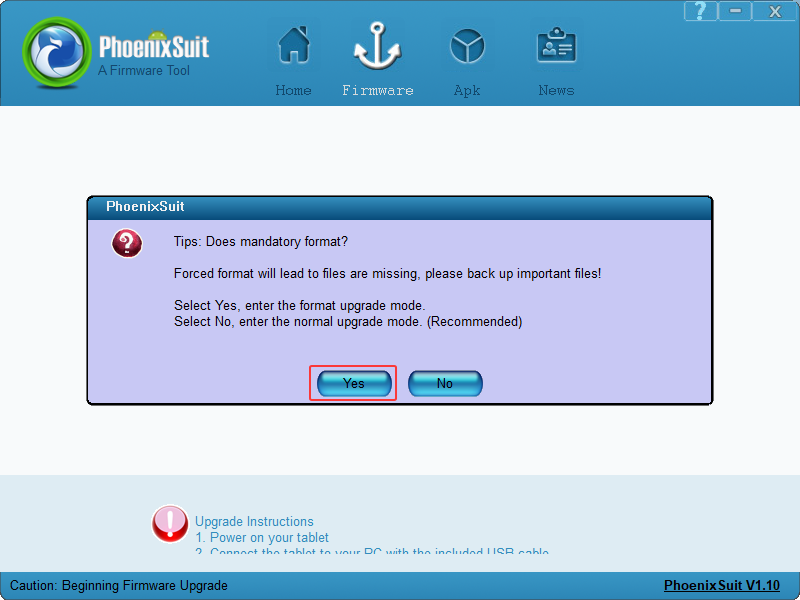
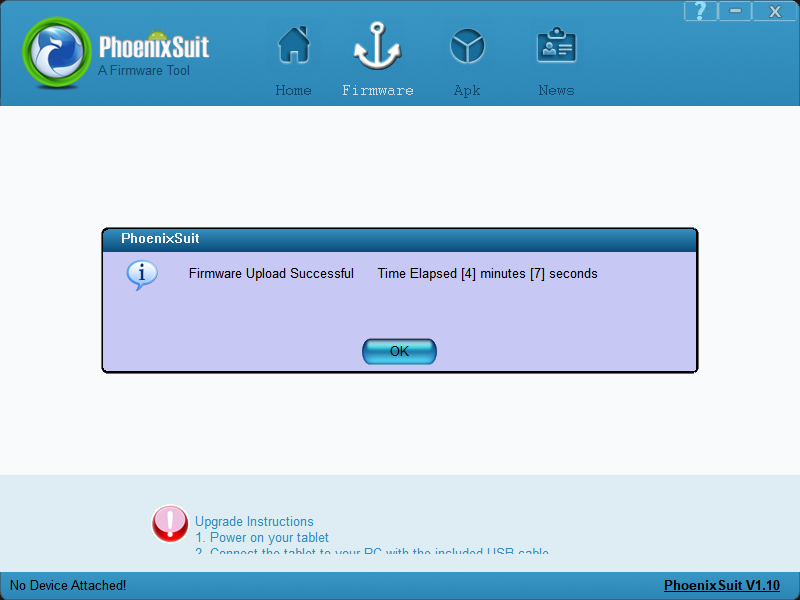
5. Re-enter the installing mode on the development board, connect the USB, and when the software displays the screen as shown below, click "Yes" to start installing. Simply wait for the installing to complete successfully.
Note
Installation Mode:
When the board is powered off, long-press the FEL button on the bottom side of the board, then connect the power supply. The green light on the board will stay on, indicating successful entry into Installation mode.
When the board is powered on, first press and hold the FEL button,don't let loose, then press RST button. The green light will stay on, indicating successful entry into Installation mode.
6. Once the image is installed successfully, the board will restart automatically.
Ubuntu Image SD Installation
The Ubuntu image currently only supports SD card installing.
Preparation
- Hardware: SD card (recommended capacity larger than 16GB), SD card reader.
- Software: installing imager tool balenaEtcher, Ubuntu image.
Steps
1. Create an SD Boot Card: Insert the SD card into the computer, open balenaEtcher to write the Linux image.

2. After installing is complete, close the imager software.

3. Insert the installed SD card into the development board, power on the board. The development board will boot from the SD card. Connect an HDMI monitor to check if the desktop is the newly installed one .
Note
1. Boot code chooses SD card as the first booting device, then onboard eMMC in booting order.
2. If you only need to boot Ubuntu from the SD card, you can skip the subsequent installing steps.

4. Installing Ubuntu system from the SD boot card to onboard eMMC.
- Connect the board to an HDMI monitor, a keyboard, and a mouse, then open the Terminal Emulator.

- Enter the following command in the Terminal

- After entering the password, press Enter. The system will automatically start installing process. Wait for the installing to complete.

- After the installing is completed, select "Power off", press the Enter , and wait for the system to restart. Then, power off the device, remove the SD card, and power it on again to check if the Ubuntu system has been installed successfully.
