Linux Common Customization
Note
Symbol explanation:
SDK$: Refers to the source code path
console$: Generally refers to the motherboard's command line console.
ADB$: Android Debug Bridge command-line tool, generally refers to the environment where ADB can be run.
SCP File Transfer
1. Usage Tips
usage: scp [-346ABCOpqRrsTv] [-c cipher] [-D sftp_server_path] [-F ssh_config]
           [-i identity_file] [-J destination] [-l limit]
           [-o ssh_option] [-P port] [-S program] source ... target
2. Quick Start
Note
$local_path: Local file path
$username: Username
$ip: Board IP
$target_path: Target path
Operation Example:
Screen Display Orientation Configuration
- View Screen Information
1. Get usage help
2. View screen information
(console)/# xrandr
Screen 0: minimum 320 x 200, current 1920 x 1080, maximum 16384 x 16384
HDMI-1 connected 1920x1080+0+0 (normal left inverted right x axis y axis) 0mm x 0mm
   1920x1080     60.00*+  60.00    50.00    50.00    59.94
   1920x1080i    60.00    50.00    50.00    59.94
   1680x1050     59.88
   1280x1024     75.02    60.02
   1440x900      59.90
   1280x960      60.00
   1360x768      60.02
   1152x864      75.00
   1280x720      60.00    50.00    50.00    59.94
   1024x768      75.03    70.07    60.00
   832x624       74.55
   800x600       72.19    75.00    60.32    56.25
   720x576       50.00    50.00    50.00
   720x480       60.00    60.00    59.94    59.94
   640x480       75.00    72.81    66.67    60.00    59.94    59.94
   720x400       70.08
DSI-1 connected (normal left inverted right x axis y axis)
   800x1280      60.51 +
DP-1 disconnected (normal left inverted right x axis y axis)
- Rotate Screen Display Orientation
Note
normal: Normal display orientation.
left: Rotate the display counterclockwise by 90 degrees.
inverted: Rotate the display clockwise by 90 degrees (180 degrees?).
right: Rotate the display by 180 degrees.
Set the rotation orientation for a specified display device
Operation Example: Configure HDMI-1 to rotate counterclockwise by 90 degrees.
- Touch Calibration
1. Install tools
2. Check Device and ID. It can be seen that the goodix-ts device id is 11
3. Reset the transformation matrix and calibration matrix. This is a critical operation. The transformation matrix needs to be set according to the screen rotation, while the calibration matrix can be set to default values.
$ xinput set-prop $id --type=float "Coordinate Transformation Matrix" 0 -1 1 1 0 0 0 0 1
// xinput set-prop 11 --type=float "Coordinate Transformation Matrix" 0 -1 1 1 0 0 0 0 1

$ xinput set-prop $id --type=float "libinput Calibration Matrix" 1.0 0.0 0.0 0.0 1.0 0.0 0.0 0.0 1.0
// xinput set-prop 11 --type=float "libinput Calibration Matrix" 1.0 0.0 0.0 0.0 1.0 0.0 0.0 0.0 1.0
Modify touch orientation (can be modified by name) Default orientation
$ xinput set-prop $id 'Coordinate Transformation Matrix' 1 0 0 0 1 0 0 0 1
// xinput set-prop 11 'Coordinate Transformation Matrix' 1 0 0 0 1 0 0 0 1
Modify touch orientation (can be modified by name) Rotate left 90 degrees
$ xinput set-prop $id 'Coordinate Transformation Matrix' 0 -1 1 1 0 0 0 0 1
// xinput set-prop 11 'Coordinate Transformation Matrix' 0 -1 1 1 0 0 0 0 1
Modify touch orientation (can be modified by name) Rotate right 90 degrees
$ xinput set-prop $id 'Coordinate Transformation Matrix' 0 1 0 -1 0 1 0 0 1
// xinput set-prop 11 'Coordinate Transformation Matrix' 0 1 0 -1 0 1 0 0 1
Modify touch orientation (can be modified by name) Rotate 180 degrees
$ xinput set-prop $id 'Coordinate Transformation Matrix' -1 0 1 0 -1 1 0 0 1
// xinput set-prop 11 'Coordinate Transformation Matrix' -1 0 1 0 -1 1 0 0 1
4. Start calibration
Language Configuration
Debian12
To modify the system language, please open a command line terminal and execute the following commands. Reboot for the changes to take effect.
- Set English language
$ locale-gen en_US.UTF-8
$ sed -i 's/^# *\(en_US.UTF-8\)/\1/' /etc/locale.gen
$ echo "LANG=en_US.UTF-8" > /etc/default/locale
$ echo "export LC_ALL=en_US.UTF-8" > /etc/profile.d/en_US.sh
$ echo "export LANG=en_US.UTF-8" >> /etc/profile.d/en_US.sh
$ echo "export LANGUAGE=en_US:en" >> /etc/profile.d/en_US.sh
$ reboot
- Set Chinese language
$ locale-gen zh_CN.UTF-8
$ sed -i 's/^# *\(zh_CN.UTF-8\)/\1/' /etc/locale.gen
$ echo "LANG=zh_CN.UTF-8" > /etc/default/locale
$ echo "export LC_ALL=zh_CN.UTF-8" > /etc/profile.d/zh_CN.sh
$ echo "export LANG=zh_CN.UTF-8" >> /etc/profile.d/zh_CN.sh
$ echo "export LANGUAGE=zh_CN:zh" >> /etc/profile.d/zh_CN.sh
$ reboot
Timezone Configuration
Tip
After executing the command, a reboot is required for it to take effect.
- Set timezone Asia/Shanghai
- Set timezone America/New_York
Network Configuration
- Temporary Configuration: Using
ifconfigandroutecommands (temporary setup). This method will be invalid after system reboot, but allows for quick testing of static IP configuration.
1. Use the ifconfig command to set IP address, subnet mask, and broadcast address:
Operation Example:
Note
Command explanation:
sudo: Run command with administrator privileges.
ifconfig: Used to configure network interfaces.
eth0: Network interface name. Use ifconfig -a to find the interface name; it could be eth0, ens33, or other names.
<IP address>: The static IP address you want to set.
<Subnet mask>: Usually 255.255.255.0 or other subnet masks.
<Broadcast address>: Calculated based on the IP address and subnet mask. For 192.168.1.100 with 255.255.255.0 mask, the broadcast address is 192.168.1.255.
2. Use the route command to set the gateway:
Note
route: Used for configuring routing.
add default gw <Gateway address>: Adds a default gateway.
<Gateway address>: Your network gateway address.
Operation Example:
- Persistent Configuration: Using the
/etc/network/interfacesfile (permanent setup) provides long-term stable static IP configuration.
1. Edit the /etc/network/interfaces file
2. Add or modify the network interface configuration:
auto eth0
iface eth0 inet static
   address 192.168.1.100
   netmask 255.255.255.0
   gateway 192.168.1.1
   # If you need to set DNS servers, you can add the following line
   dns-nameservers 8.8.8.8 8.8.4.4
Note
auto eth0: Enables the eth0 interface automatically at system startup.
iface eth0 inet static: Indicates that eth0 uses a static IP configuration.
address: Sets the IP address.
netmask: Sets the subnet mask.
gateway: Sets the gateway.
dns-nameservers: Sets DNS servers. Google's DNS servers are used here; you can use other DNS servers like 114.114.114.114, etc.
3. Save and exit the editor. In vi, press ESC key, type :wq, and press ENTER to save and exit.
4. Restart the network service or the system
Or directly reboot the system
WIFI Hotspot
Graphical Interface Configuration for WIFI Hotspot
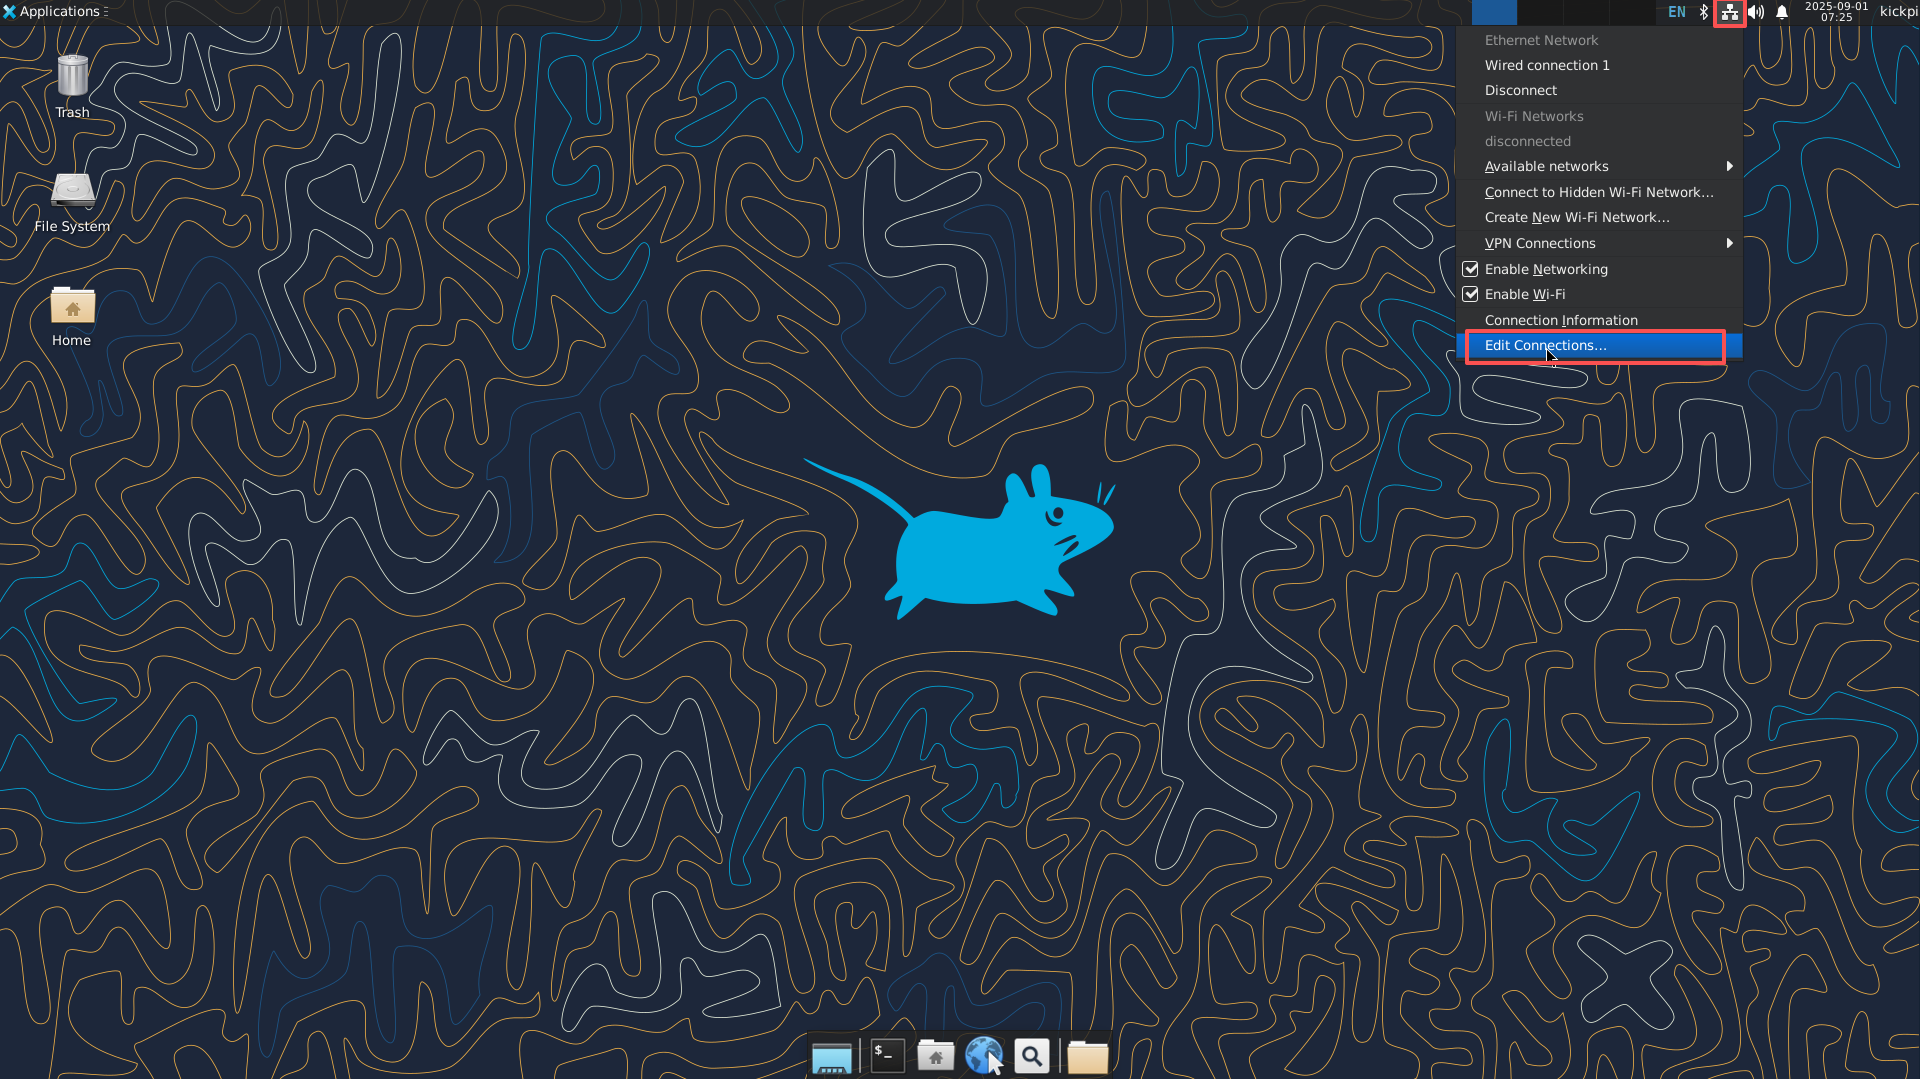
1. Connect to Ethernet, open the graphical network configuration interface (Debian: Right-click on the "Two PCs Icon")
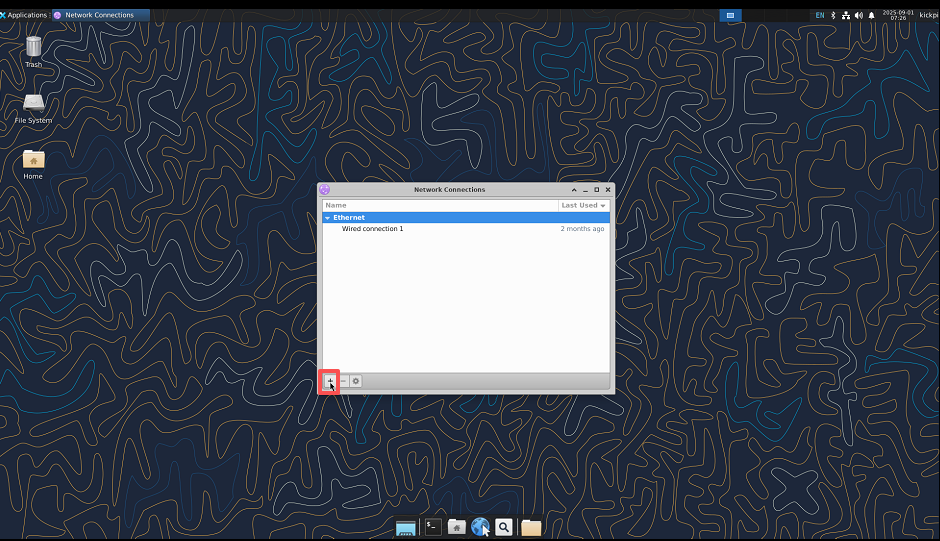
2. Add a Wi-Fi connection
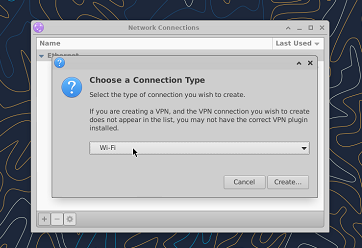
3. Select Wi-Fi type
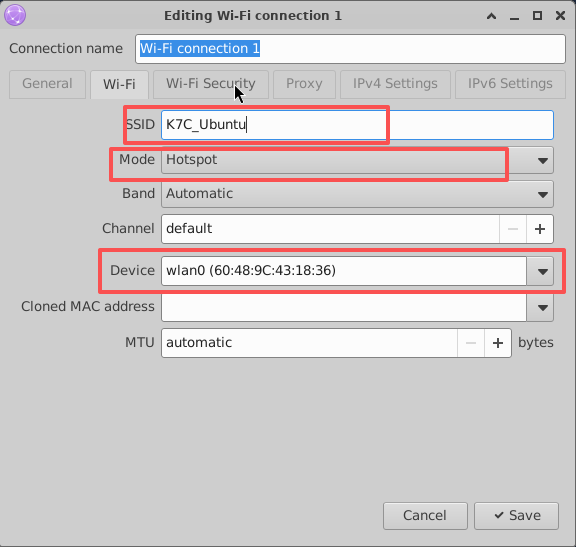
4. Configure the Wi-Fi network connection
Note
SSID: WiFi Name
Mode: Mode
Device: Device to use
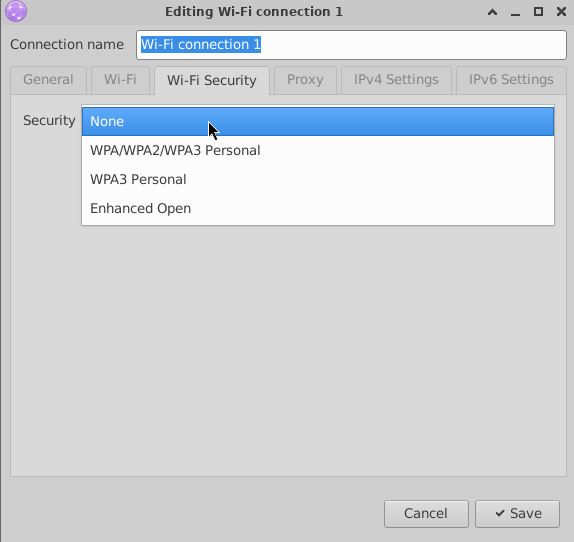
5. Configure the security settings for the Wi-Fi hotspot
Note
None: No password
WPA/WPA2/WPA3 Personal : Common encryption modes
WPA3 Personal: Supports only WPA3
Enhanced Open: Security standard for public networks
Command Line Configuration for WIFI Hotspot (AP) Mode
- Check if AP Mode is Supported
Tip
AP/VLAN indicates hardware support.
$ iw list | grep AP
Device supports AP-side u-APSD.
         * AP
         * AP/VLAN
        HE Iftypes: AP
        HE Iftypes: AP
         * wake up on EAP identity request
         * AP/VLAN
         * #{ managed } <= 1, #{ AP, P2P-client, P2P-GO } <= 1, #{ P2P-device } <= 1,
Driver supports full state transitions for AP/GO clients
Driver/device bandwidth changes during BSS lifetime (AP/GO mode)
         * AP: 0x00 0x10 0x20 0x30 0x40 0x50 0x60 0x70 0x80 0x90 0xa0 0xb0 0xc0 0xd0 0xe0 0xf0
         * AP/VLAN: 0x00 0x10 0x20 0x30 0x40 0x50 0x60 0x70 0x80 0x90 0xa0 0xb0 0xc0 0xd0 0xe0 0xf0
         * AP: 0x00 0x20 0x40 0xa0 0xb0 0xc0 0xd0
         * AP/VLAN: 0x00 0x20 0x40 0xa0 0xb0 0xc0 0xd0
Creating Hotspot Mode with Virtual Interface
1. Install dependency packages
2. Create a virtual network interface
Note
< wirelessname > is the actual wireless network card name, can be viewed with ifconfig. < virtualwlanname > is the virtual wireless network card name.
Operation Example:
3. Assign a physical address to the virtual network card
Tip
< virtualwlanname > is the virtual wireless network card name. You can fill in arbitrarily; if a conflict occurs, just change the name.
Operation Example:
4. Check the creation status
Warning
The created virtual network card will become invalid after system reboot.
$ sudo iw dev wlo2 info
   Interface wlo2
    ifindex 5
    wdev 0x5
    addr 22:33:44:55:66:00
    type managed
    wiphy 0
    txpower 0.00 dBm
    multicast TXQ:
        qsz-byt    qsz-pkt    flows    drops    marks    overlmt    hashcol    tx-bytestx-packets
        0    0    0    0    0    0    0    0    0
5. Download and install the tool create_ap
6. Use create_ap to create a hotspot
Note
< wirelessname >: Wireless network card name
< virtualwlanname >: Virtual network card name
< SSID > < password >: Hotspot WiFi name and password.
Operation Example:
If the created hotspot freezes, and you encounter the following error when starting the hotspot:
#RTNETLINK answers: Device or resource busy
#ERROR: Maybe your WiFi adapter does not fully support virtual interfaces.
# Try again with --no-virt.
Stop the previously created hotspot and restart to enable the hotspot.
Creating Hotspot Mode with Physical Interface
1. Install dependencies and create_ap
$ sudo apt-get install util-linux hostapd dnsmasq iptables iproute2 haveged make
$ git clone https://github.com/oblique/create_ap
$ cd */create_ap
$ sudo make install
2. Modify firewall
$ sudo update-alternatives --set iptables /usr/sbin/iptables-legacy
$ sudo update-alternatives --set ip6tables /usr/sbin/ip6tables-legacy
$ iptables --version
3. Create hotspot MyAccessPoint, password: 12345678, share eth0 network
4. Restore WiFi after using create_ap
NFS Configuration
- Environment Setup
- Server Side
1. Configure shared directory
$ mkdir /home/kickpi/nfs_share
$ chmod 777 /home/kickpi/nfs_share
$ vi /etc/exports
+ /home/kickpi/nfs_share *(rw,sync,no_subtree_check,insecure)
2. Start the service
3. View the current server's shared directories, confirming the share is successful
- Client Side
1. View the server's shared directories
2. Mount the directory
3. Mount successful
Chrome Hardware Acceleration
Test Platform: K7 Debian12 Chrome
- Test Method
1. Copy 1080P and 4K resolution videos to the development board and play them locally through the Chrome browser.
2. Check GPU usage:
3. Enable frame decoding logs and print:
export mpi_debug=1
export mpp_debug=1
export h264d_debug=1
export mpp_syslog_perror=1
echo 0x100 > /sys/module/rk_vcodec/parameters/mpp_dev_debug
Firmware Unpacking and Packing
A tutorial on how to unpack and repack RK firmware in Linux.
Linux
- Obtain Tools
1.Click to get tools, or find the tools in the SDK.
//Linux-SDK source code path:
rk356x-linux/tools/linux/Linux_Pack_Firmware
//Android-SDK source code path:
rk-android13.0/RKTools/linux/Linux_Pack_Firmware
- Unpacking
1. Place Linux_Pack_Firmware into your virtual machine's working directory.
2. Place the firmware to be unpacked in the rockdev directory and rename it to: update.img.
cd Linux_Pack_Firmware/rockdev
mv update-rk3568-kickpi-k1-linux-debian--20250403-150845.img update.img
3. Run the script to unpack
4. Location of unpacked files.
- Packing
Tip
After modifying the unpacked image, you can repack it.
1. Copy the files to the corresponding path in rockdev and delete the update.img image previously used for unpacking.
2. Modify the package-file file, changing the file paths to the corresponding locations where the files are placed.
# NAME  PATH
package-file    package-file
parameter       Image/parameter.txt
bootloader      Image/MiniLoaderAll.bin
uboot   Image/uboot.img
misc    Image/misc.img
boot    Image/boot.img
recovery        Image/recovery.img
backup  RESERVED
rootfs  Image/rootfs.img
3. Run the script corresponding to your version to pack.
4. The packed image is located in the rockdev directory.
Backup rootfs System
Tip
The rootfs replaced in this way might have mount UUID issues. Use blkid to find the correct UUID and modify /etc/fstab.
Insert a USB drive into the board, with a capacity of at least 16GB or more. The packaged image will be relatively large.
1. Insert USB drive (≥ 16GB), copy the script to the development board's Linux system and run it
Note
Output package name format: e.g., rootfs.img. /mnt/usb : USB drive mount directory.
2. Ensure the packaged file format is correct
Tip
FAT32 cannot handle single files larger than 4G. If the system is too large, please format the USB drive as ext4 or exfat.
$ file Ubuntu_24.04.2_LTS_ext4_202503062020.img
Ubuntu_24.04.2_LTS_ext4_202503062020.img: Linux rev 1.0 ext4 filesystem data, UUID=71584b93-ad99-452e-a8e2-6b9ed76eff7d, volume name "rootfs" (extents) (64bit) (large files) (huge files)
3. Repack, replace rootfs.img into the full image, refer to Firmware Unpacking and Packing; You can also burn rootfs.img separately. After burning, the root filesystem's occupied space will match the image file (img) size. Execute the command to restore the size.
eMMC Partitioning
Warning
Repartitioning requires re-flashing. If you need to retain the system without formatting, please backup rootfs first.
Two methods to accomplish the modification:
- Modify Full Image
Refer to Firmware Unpacking and Packing, modify the parameter.txt file and repack.
- Modify within SDK, After modifying the files in the corresponding path, recompile.
RK3576:
Modification Content:Repartitioning mainly involves modifying the partition file parameter.txt
Operation Example: Allocate all remaining space to the root directory
mtdparts=:0x00002000@0x00004000(uboot),0x00002000@0x00006000(misc),0x00020000@0x00008000(boot),0x00040000@0x00028000(recovery),0x00010000@0x00068000(backup),-@0x00078000(rootfs:grow)
Note
File partition rules:
Partition size: 0x01c00000*512Byte/1024/1024/1014 ≈ 14G
Partition start address: previous partition start address + previous partition size
The format for the last partition is: -@0x0xxxxx(xxx:grow) - indicates all remaining space is adaptive.
For Linux systems, an additional modification step is needed: comment out the auto-mounting of oem userdata.
4G/5G Configuration
Script Configuration
Automatic configuration for 4G/5G mobile modules at boot, detecting module presence and performing configuration dialing
Tip
By default, it only dials once at boot. In poor signal or abnormal communication situations, dialing might fail. If there's no network, you can run the dialing script to retry.
(console)$ cat /usr/bin/hardware-optimization
4g_config() {
    wait_time=30
        for((i=1;i<=$wait_time;i++));
        do
                if [ -c /dev/ttyUSB2 ]; then
                        echo "$i: 4g /dev/ttyUSB2 exists and is a character device." >> $LOG_FILE
                        /usr/bin/4G_dialing.sh
            break;
                else
                        echo "$i: 4g /dev/ttyUSB2 does not exist or is not a character device." >> $LOG_FILE
                        sleep 1
                fi
        done
}
Dialing script, adapted for RG200U / EC200 / EC20
RG200U performs automatic dialing by the module itself. It can be forced configured and restarted.
Warning
This operation resets the module. You need to wait for /dev/ttyUSB2 to be remounted before 4G_dialing.sh re-performs dialing configuration.
1. $ 4G_dialing.sh force
2. Wait for /dev/ttyUSB2
3. $ 4G_dialing.sh
Network Test
1. Determine if the module is connected by checking the logs.
Tip
/dev/ttyUSB2 exists and is a character device. indicates the device is recognized successfully
$ cat /tmp/kickpi-hardware.log
1: 4g /dev/ttyUSB2 does not exist or is not a character device.
2: 4g /dev/ttyUSB2 does not exist or is not a character device.
...
24: 4g /dev/ttyUSB2 does not exist or is not a character device.
25: 4g /dev/ttyUSB2 exists and is a character device.
Or check if /dev/ttyUSB2 exists
2. Determine if dialing was successful
Tip
The device name format is enx* (* is a variable suffix). Please refer to the actual environment for the specific name.
(console)$ ifconfig
enxca7f24fb0e94: flags=4163<UP,BROADCAST,RUNNING,MULTICAST>  mtu 1500
        inet 10.138.192.102  netmask 255.255.255.0  broadcast 10.138.192.255
        inet6 fe80::583f:ed51:782d:318d  prefixlen 64  scopeid 0x20<link>
        ether ca:7f:24:fb:0e:94  txqueuelen 1000  (Ethernet)
        RX packets 181  bytes 15185 (14.8 KiB)
        RX errors 0  dropped 0  overruns 0  frame 0
        TX packets 194  bytes 17394 (16.9 KiB)
        TX errors 0  dropped 0 overruns 0  carrier 0  collisions 0
3. Ping network test
Tip
Ping network test using the specified device enx3e003a5bd6ad.
(console)$ ping www.baidu.com -I enxca7f24fb0e94
PING www.wshifen.com (103.235.46.115) from 10.138.192.102 enxca7f24fb0e94: 56(84) bytes of data.
64 bytes from 103.235.46.115 (103.235.46.115): icmp_seq=1 ttl=45 time=1094 ms
64 bytes from 103.235.46.115 (103.235.46.115): icmp_seq=2 ttl=45 time=3924 ms
64 bytes from 103.235.46.115 (103.235.46.115): icmp_seq=3 ttl=45 time=1870 ms
GPU
- ARM Mali-G52 MC3 GPU Core Specifications and Supported APIs
- Check GPU Usage
Operation Example:
Monitor GPU usage in real-time by moving the mouse, dragging windows, or running GPU-specific tests to determine if hardware acceleration is successfully enabled.
- GLmark2 Performance Test
1. Use the npu test script provided by Rockchip
$ ls /rockchip-test/gpu
gpu_test.sh  test_fullscreen_glmark2.sh  test_normal_glmark2.sh test_offscreen_glmark2.sh  test_stress_glmark2.sh
2. The Debian / Ubuntu filesystem already includes the glmark2-es performance testing tool. Use a virtual terminal or debug serial terminal to execute the following command to start the GPU performance test.
Tip
800x600 glmark2 test score is 1405.
Test results are for reference only. Actual scores depend on the actual measurement.
root@linaro-alip:/# source /rockchip-test/gpu/test_offscreen_glmark2.sh
run glmark2 x11 with offscreen......
arm_release_ver: g13p0-01eac0, rk_so_ver: 10
=======================================================
    glmark2 2023.01
=======================================================
    OpenGL Information
    GL_VENDOR:      ARM
    GL_RENDERER:    Mali-G52
    GL_VERSION:     OpenGL ES 3.2 v1.g13p0-01eac0.0fd2effaec483a5f4c440d2ffa25eb7a
    Surface Config: buf=32 r=8 g=8 b=8 a=8 depth=24 stencil=0 samples=0
    Surface Size:   800x600 windowed
=======================================================
=======================================================
                                  glmark2 Score: 1405
=======================================================
NPU
- Key Parameters
6 TOPS*@INT8
Support int4/int8/int16/FP16/BF16/TF32
Support deep learning frameworks: TensorFlow, Caffe, Tflite, Pytorch, Onnx NN, Android NN, etc
- Debian / Ubuntu
Rockchip provides npu test scripts
npu frequency scaling script npu_freq_scaling.sh
usage()
{
    echo "Usage: npu_freq_scaling.sh [test_second] [every_freq_stay_second]"
    echo "example: ./npu_freq_scaling.sh 3600 30"
    echo "means npu_freq_scaling.sh will run 1 hour and every cpu frequency stay 30s"
}
Operation Example: Run npu frequency scaling for 60 seconds, changing frequency every 10 seconds.
# ./npu_freq_scaling.sh 60 10
test will run 60 seconds
every npu frqeucny will stay 10 seconds
set ddr frequency to 700000000
set ddr frequency to 300000000
set ddr frequency to 700000000
set ddr frequency to 950000000
set ddr frequency to 500000000
set ddr frequency to 700000000
======TEST SUCCESSFUL, QUIT=====
npu stress test script npu_stress_test.sh
# ./npu_stress_test.sh
rknn_api/rknnrt version: 2.0.0b0 (35a6907d79@2024-03-24T10:31:14), driver version: 0.9.7
model input num: 1, output num: 1
input tensors:
  index=0, name=input, n_dims=4, dims=[1, 224, 224, 3], n_elems=150528, size=150528, fmt=NHWC, type=INT8, qnt_type=AFFINE, zp=0, scale=0.007812
output tensors:
  index=0, name=MobilenetV1/Predictions/Reshape_1, n_dims=2, dims=[1, 1001, 0, 0], n_elems=1001, size=2002, fmt=UNDEFINED, type=FP16, qnt_type=AFFINE, zp=0, scale=1.000000
custom string:
Begin perf ...
   0: Elapse Time = 2.85ms, FPS = 351.12
   1: Elapse Time = 2.70ms, FPS = 370.37
   2: Elapse Time = 2.59ms, FPS = 386.85
   3: Elapse Time = 2.69ms, FPS = 371.61
   4: Elapse Time = 2.62ms, FPS = 381.97
   5: Elapse Time = 2.61ms, FPS = 383.44
   6: Elapse Time = 2.58ms, FPS = 387.75
   7: Elapse Time = 2.70ms, FPS = 370.51
   8: Elapse Time = 2.64ms, FPS = 378.36
   9: Elapse Time = 2.68ms, FPS = 372.44
---- Top5 ----
0.935059 - 156
0.057037 - 155
0.003881 - 205
0.003119 - 284
0.000172 - 285
Note
Performance Test Data Interpretation:
The content after Begin perf... shows the performance metrics details from multiple model inferences. Each data item includes the test round number, single inference time (Elapse Time), and frames per second (FPS).
Taking 0: Elapse Time = 2.85ms, FPS = 351.12 as an example, it means the first round of model inference took 2.85 milliseconds, which translates to approximately 351.12 inference operations per second. Here, FPS is calculated as 1000ms ÷ single inference time, representing the NPU's inference efficiency.
Inference Result Data Interpretation:
The ---- Top5 ---- section displays the top five classification results output by the model inference, ranked by confidence. Each data item consists of two parts: "category confidence probability" and "category number". The specific meanings are as follows:
1. 0.935059 - 156: The model judges the input sample belongs to category number 156 with a confidence probability of 93.51%. This probability value is relatively high, reflecting a high degree of confidence in the model's classification result;
2. The subsequent entries 0.057037 - 155, 0.003881 - 205, 0.003119 - 284, 0.000172 - 285, are the classification results ranked 2nd to 5th by confidence. Their confidence probabilities show a decreasing trend, corresponding
Q&A
- Linux system reboots for the first time after flashing?
In order to be compatible with different chips, the general Debian system's /etc/init.d/rockchip.sh script will, upon first boot, install various chip-specific packages (such as libmali, isp, etc.) according to the chip. After the installation is complete, it will restart the display service. For independent projects, you can handle these differences when creating the image to avoid this.
- create_ap reports a dnsmasq error?
Error encountered during creation
This is because create_ap needs to start dnsmasq, but dnsmasq is already running.
Find the corresponding PID for dnsmasq
- create_ap compatibility patch issue with iw version 6.7 and above?
@@ -321,9 +321,9 @@ can_transmit_to_channel() {

    if [[ $USE_IWCONFIG -eq 0 ]]; then
        if [[ $FREQ_BAND == 2.4 ]]; then
-           CHANNEL_INFO=$(get_adapter_info ${IFACE} | grep " 24[0-9][0-9] MHz \[${CHANNEL_NUM}\]")
+           CHANNEL_INFO=$(get_adapter_info ${IFACE} | grep " 24[0-9][0-9]\(\.0\+\)\? MHz \[${CHANNEL_NUM}\]")
        else
-           CHANNEL_INFO=$(get_adapter_info ${IFACE} | grep " \(49[0-9][0-9]\|5[0-9]\{3\}\) MHz \[${CHANNEL_NUM}\]")
+           CHANNEL_INFO=$(get_adapter_info ${IFACE} | grep " \(49[0-9][0-9]\|5[0-9]\{3\}\)\(\.0\+\)\? MHz \[${CHANNEL_NUM}\]")
        fi
        [[ -z "${CHANNEL_INFO}" ]] && return 1
        [[ "${CHANNEL_INFO}" == *no\ IR* ]] && return 1
@@ -339,7 +339,9 @@ can_transmit_to_channel() {

# taken from iw/util.c
ieee80211_frequency_to_channel() {
-   local FREQ=$1
+   local FREQ_MAYBE_FRACTIONAL=$1
+   local FREQ=${FREQ_MAYBE_FRACTIONAL%.*}

    if [[ $FREQ -eq 2484 ]]; then
        echo 14
    elif [[ $FREQ -lt 2484 ]]; then
@@ -356,7 +358,7 @@ ieee80211_frequency_to_channel() {
}

is_5ghz_frequency() {
-    [[ $1 =~ ^(49[0-9]{2})|(5[0-9]{3})$ ]]
+   [[ $1 =~ ^(49[0-9]{2})|(5[0-9]{3})(\.0+)?$ ]]
}